
Integrating Klaviyo for Your Mobile App!

In this article
- Invite Shop2App to your Klaviyo account
- Setting up Klaviyo API keys for Shop2App
- Enabling the integration on Shop2App
- Configure Push Notifications on Klaviyo
1. Invite Shop2App to your Klaviyo account
Step 1: Log in to your Klaviyo account.
Step 2: Click on your account name and go to Settings.

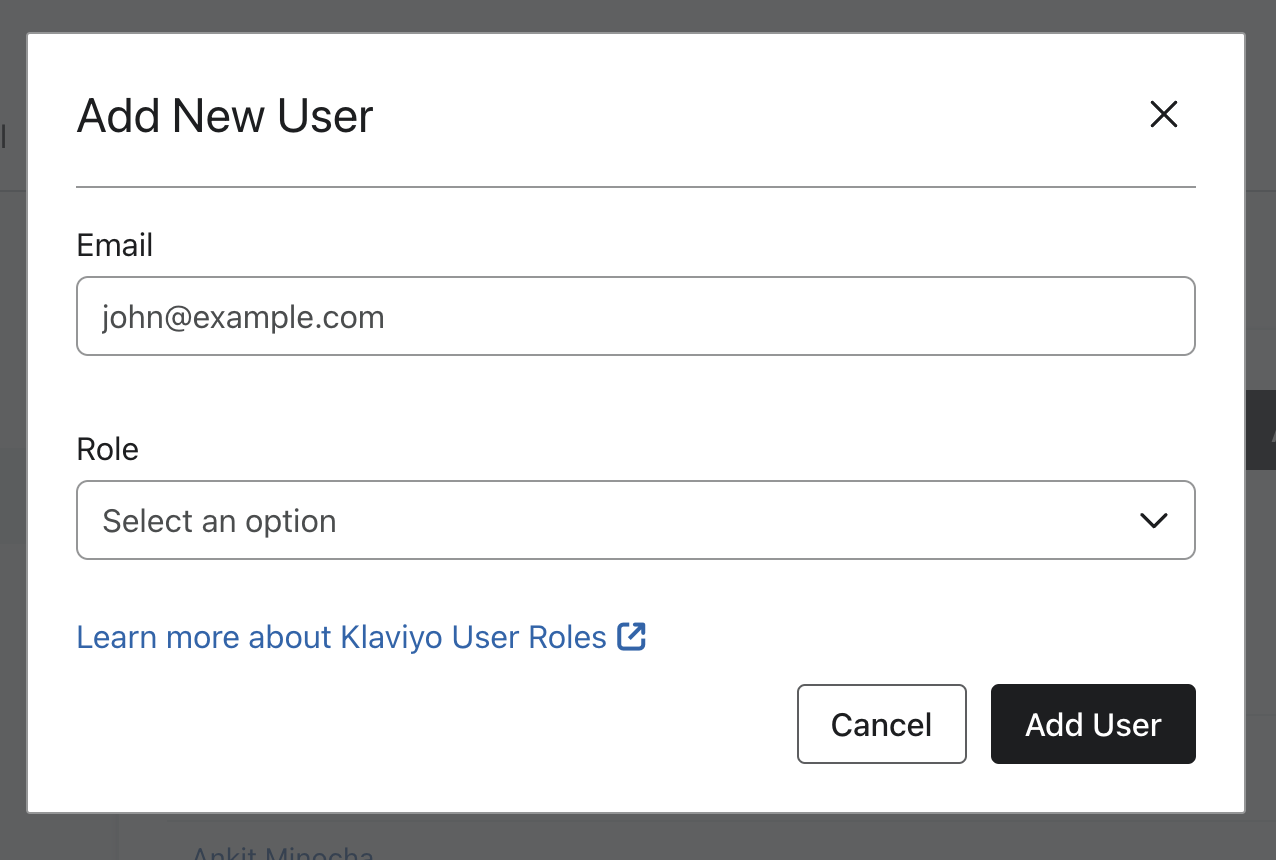
Step 3: Go to Users and click on Add New User.

Step 4: Enter support@shop2app.com as the Email with ‘Manager’ as the Role.

Step 5: Click on Add User when you’re done.
2. Setting up Klaviyo API keys for Shop2App
Here’s how you can find the API keys on your Klaviyo dashboard
Step 1: Click on your account name from the navigation bar on the left and select Settings.

Step 2: Head to API Keys. You can find your public API key (i.e., Site ID) and your private API keys in this location.

Step 3: Copy the public API key and you are done.

3.Enabling the integration on Shop2App
Step 1: Head over to the Integrations section on your Shop2App dashboard.

Step 2: You’ll find Klaviyo in the Email Marketing, SMS section. Click on it.

Step 3: Paste the Public API key that you copied from the Klaviyo dashboard.

Step 4: Turn on the Integration & Now you’re done.
4. Configure Push Notifications on Klaviyo
To configure Push Notifications on Klaviyo, follow the steps mentioned in the links given below:
- For iOS: https://help.klaviyo.com/hc/en-us/articles/360023213971
- For Android: https://help.klaviyo.com/hc/en-us/articles/14750928993307
You are all set to take advantage of the new Shop2App - Klaviyo integration to enhance your push notification campaigns and boost sales like never before. Wishing you successful selling!
Should you have any further inquiries regarding the Klaviyo Integration, please reach out to us at help@shop2app.com !
We're here to assist you!